
Why a professional, transparent estimate wins more jobs
Most homeowners will call three to five roofers before signing a contract. They do not know shingle grades, local labor rates, or what “per square” even means. But they can spot a vague number scribbled on a notepad from a mile away. When you hand them a clean, itemized breakdown, you instantly separate yourself from the pack. You stop being just another roofer and start looking like the safe, obvious choice.
Roofing carries the highest cost per lead in home services at roughly $228 (research findings). That means every estimate you send has to convert. You cannot afford to lose jobs because a homeowner did not understand what they were paying for. A professional free roofing estimate template that educates the client while justifying every dollar is not just paperwork. It is a sales asset. Homeowners assume that the contractor who explains things clearly is the one who will also install the roof correctly.
Transparency also protects your profit. When you lump everything into a single number, you invite two problems. First, the homeowner compares your price against a competitor who may have excluded tear-off or decking replacement. Second, you absorb the cost of anything you forgot to price. Breaking your estimate into clear line items sets expectations, reduces haggling, and makes your final price feel earned rather than invented.

What a complete roofing estimate looks like — the line-item breakdown
Every roofing estimate you write should answer one question before the homeowner asks it: “What exactly am I paying for?” The way to answer that is through consistent, repeatable line items. Here are the non-negotiable categories every estimate must include.
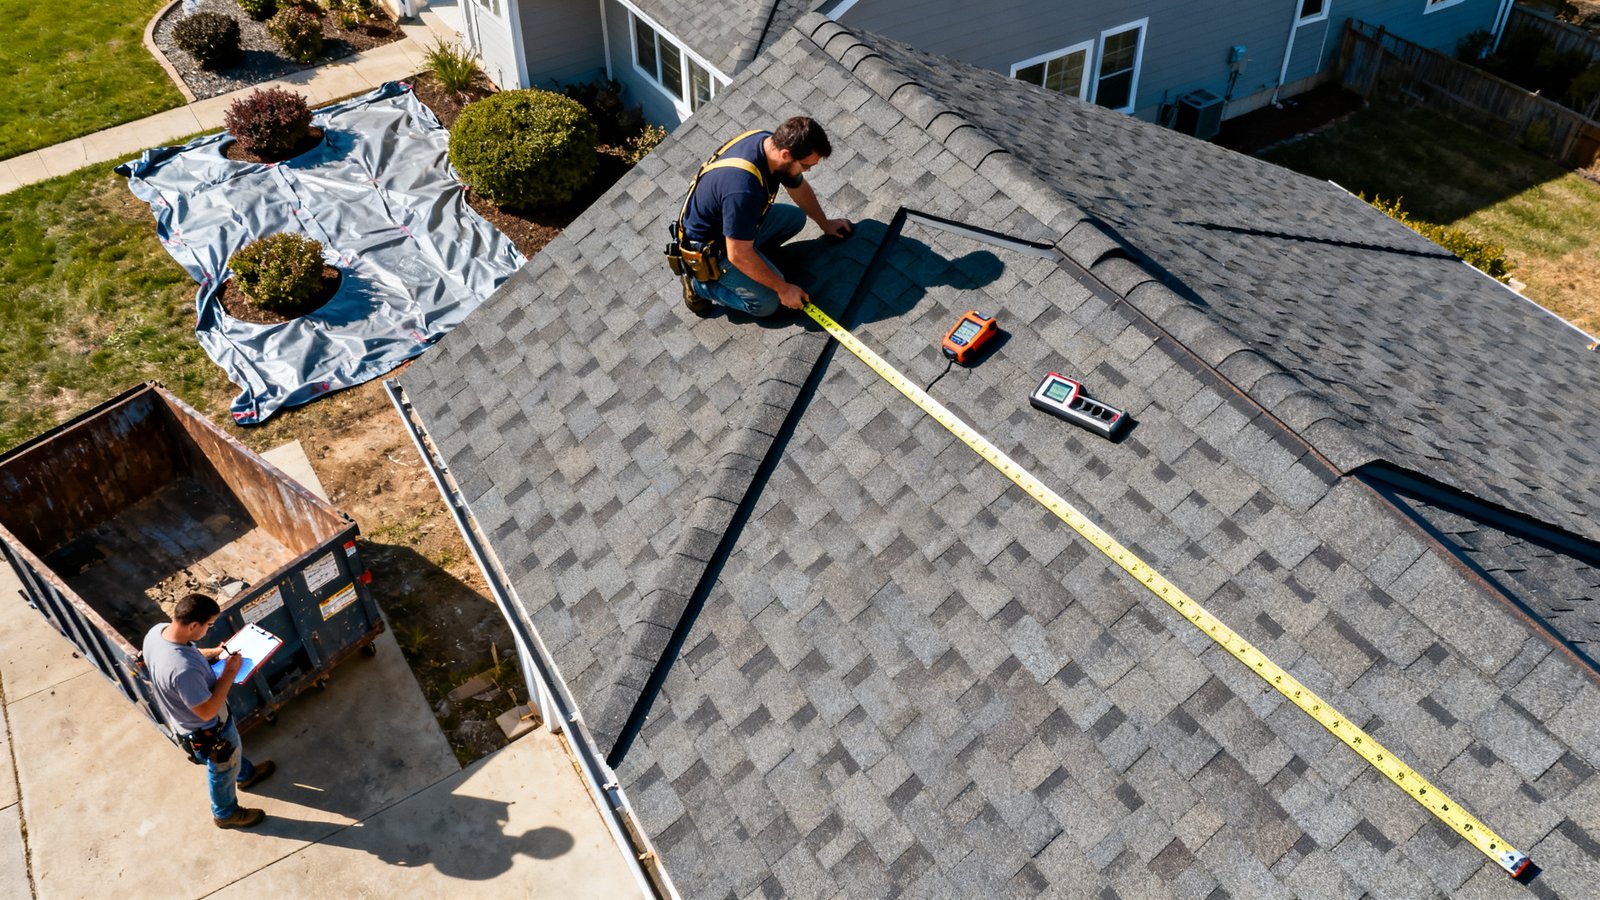
Roof area in squares. One square equals 100 square feet. State the total number of squares measured, including the pitch multiplier applied. Show the math or at least reference it. Homeowners appreciate knowing the size was calculated, not guessed.
Pitch multiplier. If the roof is anything steeper than a 4/12 pitch, show the multiplier and briefly explain why steeper roofs cost more. This one line item prevents an enormous amount of sticker shock.
Materials by unit. Shingles, underlayment, drip edge, valley flashing, ridge vent, pipe boots, and starter strips. List each with a unit cost per square or per linear foot. Do not bundle these into one number. Bundling hides what you are actually installing and makes it harder to justify upgrades.
Labor by unit. Separate installation labor from tear-off labor. Each should have a per-square rate. This clarity helps the homeowner understand that a two-layer tear-off genuinely costs more in crew hours and is not a markup trick.
Tear-off, disposal, and dumpster. Call this out as its own line or group. Disposal fees range from roughly $300 to $800 per job based on available data (Puetz Construction, 2025). Tear-off including all costs runs approximately $100 to $175 per roofing square (SquareDash). If you hide disposal inside a lump sum, the homeowner cannot see that you are charging a fair pass-through cost.
Decking replacement allowance. State a per-sheet price for OSB or plywood and note that actual replacement quantity will be confirmed once the old shingles come off. This is not optional. Without it, you are gambling your profit on what is hiding under the shingles.
Permits, overhead, profit, and contingency. Permit fees are real and verifiable. Overhead and profit are how you stay in business. List them. A contingency allowance of 3 to 5 percent for unexpected conditions signals that you are prepared and honest, not that you are padding the number.
For a complete breakdown structure, you can use an online estimate maker no signup tool to generate a clean PDF template that already groups these items logically. This saves you from building something from scratch every time.
How to measure roof size in squares and apply pitch multipliers
Accurate roof measurement is the foundation of every profitable estimate. If you get this wrong, everything else cascades. You either underbid and lose money or overbid and lose the job.
Start by calculating the footprint area of each roof plane in square feet. Multiply length by width for each rectangular section. For hips, valleys, and irregular shapes, break the plane into triangles and rectangles. A triangle is base times height divided by two. Add all plane areas together to get the total footprint square footage.
Now apply the pitch multiplier. Roof pitch is expressed as rise over run. A 4/12 pitch means the roof rises 4 inches for every 12 inches of horizontal run. The multiplier accounts for the extra surface area created by the slope. Here is a quick reference table for common pitches:
| Pitch | Multiplier |
|---|---|
| 4/12 | 1.054 |
| 5/12 | 1.083 |
| 6/12 | 1.118 |
| 7/12 | 1.158 |
| 8/12 | 1.202 |
| 9/12 | 1.250 |
| 10/12 | 1.302 |
| 12/12 | 1.414 |
Multiply your total footprint square footage by the pitch multiplier to get the actual roof surface area. Then divide by 100 to convert to roofing squares. Always round up to the nearest whole square. A roof measuring 23.2 squares becomes 24 squares in your estimate.
Satellite measurement tools are helpful but not perfect. Always verify with field measurements when possible. Look for features that satellites miss: chimneys, skylights, cricket valleys, and dormer intersections. These add labor and material complexity that square footage alone does not capture.
Regarding waste factors, no reliable NRCA waste formula for steep roofs was found in the research data. Evidence is limited. A conservative approach is to add 10 percent waste for standard roofs and up to 15 percent for steep or complex cut-up roofs. Document your waste factor in the estimate so the homeowner sees it is intentional, not arbitrary.
Material cost estimates — shingles, underlayment, flashing, drip edge, ventilation
Material estimating is where new roofers often leave money on the table. They remember shingles and underlayment but forget the linear items that add up fast. Here is how to build a complete material list with pricing.
Shingles. Price per square from your supplier. Include the manufacturer’s recommended starter strip quantity and ridge cap shingles. Three-tab shingles typically run lower per square than architectural or designer shingles. Know your supplier’s current pricing and update it regularly. Research did not provide universal material unit prices, so linking to your supplier’s latest price sheet or using a roofing bid template that references current catalog pricing is a smarter workflow.
Underlayment. Calculate rolls needed based on total squares. One roll of 15-pound felt typically covers about 4 squares. Synthetic underlayment covers more area per roll. List the per-square cost and multiply.
Drip edge. Measure the total linear footage of all eaves and rakes. Drip edge is priced per linear foot and often comes in 10-foot lengths. New roofers frequently forget this line item entirely. On a 30-square roof, drip edge can easily run 200 to 300 linear feet.
Valley flashing and pipe boots. Valleys are measured in linear feet. Count every plumbing vent, furnace flue, and exhaust pipe. Each needs a pipe boot or flashing assembly. These small items add up fast on larger homes.
Ventilation. Ridge vent, box vents, soffit vents, or powered ventilators. Count them, price them per unit, and include them. Balanced ventilation is code-required in most jurisdictions. Skipping it in the estimate creates a problem later.
Markup rule. Materials should carry a markup of at least 15 to 25 percent above your cost. This covers procurement time, delivery coordination, warranty handling, and the risk of price fluctuations between estimate and purchase. Do not sell materials at cost. You are not a wholesale distributor.
Labor estimating — crew hours, local labor rates, and multi-layer tear-off
Labor is the largest variable in any roofing estimate. Get it wrong and your profit evaporates. Here is how to build a defensible labor estimate that accounts for real conditions.
Start with a per-square labor rate for installation. This rate should reflect your crew’s average production speed and your local wage market. If your crew of four can install 8 squares per day and you pay them a combined $800 per day, your base labor cost is $100 per square for installation. Adjust this number based on your actual crew costs and productivity.
For tear-off, the labor component alone ranges from roughly $100 to $300 per roofing square according to Gorilla Roofing’s 2025 labor overview. The wide range reflects differences in pitch, layers, and accessibility. A single-layer tear-off on a simple 4/12 roof sits at the low end. A steep two-layer tear-off with poor access sits at the high end.
Multi-layer tear-off increases labor requirements significantly. SquareDash reports total tear-off costs for two layers at $125 to $175 per roofing square including labor, disposal, and cleanup. Build this into your labor line or your tear-off line, but do not assume single-layer rates when the homeowner has an overlay situation.
Factor in travel time, setup and breakdown, and weather contingencies. A roof that takes three days of actual installation may require five calendar days. Your labor estimate should cover the hours worked, not just the square count. Add 10 to 15 percent as a labor contingency for unexpected complexity.
Tear-off, disposal, dumpster and protection — how to price demolition
Demolition is where many new contractors underbid by hundreds or even thousands of dollars. This section must be precise, transparent, and backed by real numbers.
Tear-off pricing can be structured per square or as a lump sum for the job. Per-square pricing is generally more defensible with homeowners because it scales visibly with roof size. All-in tear-off costs including labor, disposal, and cleanup run approximately $100 to $175 per roofing square (SquareDash). Labor-only tear-off runs $100 to $300 per square (Gorilla Roofing). Your market will determine where you land within these ranges.
Disposal deserves its own line. Dumpster rental and landfill fees typically run $300 to $800 per job according to Puetz Construction’s 2025 data. Call your local waste haulers and get current quotes before finalizing any estimate. Disposal costs vary significantly by region and landfill tipping fees.
Site protection includes tarps, plywood for driveway protection, and landscaping covers. While the research data could not isolate a specific protection cost separate from disposal, Ridge Top Exteriors reports that typical full tear-off totals run $1,000 to $3,000 per job. A reasonable approach is to allocate $150 to $300 for protection materials and labor depending on job complexity.
Always include language in your estimate that additional layers or hazardous materials discovered during tear-off will trigger a change order. If you peel off a roof and find a third layer or rotted sheathing under what you priced as a single-layer removal, you need the homeowner’s signed approval before proceeding. Your estimate protects you when it clearly states assumptions and exclusions. Understanding the estimate vs invoice difference is helpful here because the estimate sets the scope and the final invoice reflects approved changes.
Decking replacement, permits, and other commonly overlooked chargeable items
Research findings confirm that new roofers commonly underbid because they do not account for pitch complexity, decking replacement, or disposal fees. These oversights are not minor. They can erase your entire profit on a job.
Decking replacement. Never assume the decking is in good condition. Price a per-sheet replacement rate, typically $60 to $100 per sheet including material and labor, and include an allowance for a reasonable number of sheets based on roof size. For a 30-square roof, you might allow for 4 to 6 sheets. State clearly that additional sheets will be billed at the per-sheet rate upon discovery.
Ice and water shield. Required by code in cold climates along eaves, valleys, and around penetrations. Measure the linear footage and price it per square or per roll. This is not optional in most northern states and failing to include it is a compliance risk.
Permits. Permit fees vary by municipality. Call your local building department and get the exact fee schedule. Include the permit cost as a separate line with zero markup or a small processing fee. Homeowners can verify the fee independently, so being transparent here builds trust.
Change order language. Every estimate should include a sentence like this: “Decking replacement is estimated based on visible conditions. If additional deteriorated decking is found after tear-off, the homeowner will be notified and must approve additional charges before replacement proceeds.” This one sentence has saved countless contractors from eating hundreds in materials and labor.
When you need a comprehensive contractor quote template free that includes all these line items with proper change order terms, using a pre-built framework reduces the risk of forgetting a chargeable item on every new bid.
How to present line items to homeowners — sample estimate template and terminology
The way you present your estimate matters as much as the numbers inside it. A clean, grouped layout with plain English descriptions closes more deals than a dense wall of contractor shorthand.
Group your line items logically. Start with the roof scope: squares measured, pitch, and total surface area. Then materials by category. Then labor. Then demolition and disposal. Then additional items like decking allowance and permits. Then overhead, profit, and the final total.
Use terminology a homeowner can understand without a dictionary. Instead of “instl felt 15# ASTM D226,” write “Synthetic underlayment, water-resistant barrier installed over entire roof deck.” Instead of “flash per mfr spec,” write “Custom bent aluminum flashing at all roof-to-wall intersections and chimney bases.” Clarity is not dumbing down. It is respecting your client’s intelligence while acknowledging this is not their trade.
Include the project timeline, warranty terms specific to both materials and workmanship, and a clear payment schedule. A typical schedule might be 10 percent at contract signing, 40 percent at material delivery, 40 percent at substantial completion, and 10 percent upon final walkthrough. Adjust based on your state’s laws for contractor deposits. Some states cap down payments. Know your local rules.
The research did not provide data on the most disputed line items per homeowner reviews, but proactive clarity on tear-off, decking, and disposal is widely recommended because these are the items that change most often after the job starts. When you describe these clearly upfront, you reduce the friction of asking for a change order later. A professional estimate template with these sections pre-built ensures you never forget a critical disclosure.
Two worked numerical examples — simple roof and steep complex roof
Seeing the math in action makes everything clearer. Here are two realistic scenarios using the per-square ranges from the research data.
Example 1: Simple 24-square ranch, 4/12 pitch, single layer tear-off
Measurements: Footprint 2,200 sq ft. Pitch multiplier 1.054. Actual roof area 2,319 sq ft. Rounded to 24 squares.
Materials: Architectural shingles at $110 per square x 24 = $2,640. Underlayment at $18 per square x 24 = $432. Drip edge 260 linear ft at $2.50/ft = $650. Valley flashing 40 linear ft at $5/ft = $200. Ridge vent 60 linear ft at $4/ft = $240. Pipe boots 4 at $30 each = $120. Starter strip included in shingle order. Total materials: $4,282.
Installation labor: $100 per square x 24 = $2,400.
Tear-off labor: Single layer at $120 per square (mid-range labor-only) x 24 = $2,880.
Disposal and dumpster: $500 lump sum based on local quote.
Site protection: $200.
Decking allowance: 4 sheets at $80 each = $320.
Permits: $250.
Subtotal: $10,832. Overhead and profit at 25 percent: $2,708. Contingency at 3 percent: $325. Final estimate total: $13,865.
Example 2: Steep 32-square two-story, 9/12 pitch, two-layer tear-off
Measurements: Footprint 2,550 sq ft. Pitch multiplier 1.25. Actual roof area 3,188 sq ft. Rounded to 32 squares.
Materials: Architectural shingles at $110 per square x 32 = $3,520 plus 15 percent waste for steep pitch = $4,048. Underlayment at $18 per square x 32 = $576. Drip edge 340 linear ft at $2.50/ft = $850. Valley flashing 70 linear ft at $5/ft = $350. Ridge vent 80 linear ft at $4/ft = $320. Pipe boots 6 at $30 each = $180. Ice and water shield 300 linear ft at $2/ft = $600. Total materials: $6,924.
Installation labor: Steep pitch premium at $140 per square x 32 = $4,480.
Tear-off labor: Two-layer tear-off at $150 per square (all-in range from SquareDash) x 32 = $4,800.
Disposal and dumpster: Larger dumpster for two layers at $700.
Site protection: Two-story protection at $350.
Decking allowance: 6 sheets at $80 each = $480.
Permits: $300.
Subtotal: $18,034. Overhead and profit at 25 percent: $4,509. Contingency at 5 percent for complexity: $902. Final estimate total: $23,445.
These examples show how pitch, layers, and waste factor compound quickly. The steep roof costs nearly $10,000 more than the simple ranch for only 8 additional squares. This is why accurate measurement and honest per-square breakdowns are essential for your credibility and your bank account.
Quick-reference cheat sheet and calculator fields for your Excel or Google template
Build a spreadsheet that does the heavy lifting. Every time you create an estimate, fill in these fields and let formulas calculate the totals. Here are the essential input fields and recommended default ranges based on research data.
| Field | Recommended Default Range |
|---|---|
| Roof squares (after pitch multiplier) | Measured, rounded up |
| Pitch multiplier | 1.054 to 1.414 based on pitch table |
| Shingle cost per square | Get current supplier pricing |
| Underlayment per square | $15 to $25 per square |
| Drip edge per linear ft | $2 to $4 per linear ft |
| Tear-off per square (all-in) | $100 to $175 per square |
| Tear-off labor only per square | $100 to $300 per square |
| Two-layer tear-off total per square | $125 to $175 per square |
| Dumpster and disposal lump sum | $300 to $800 per job |
| Decking per sheet | $60 to $100 per sheet |
| Installation labor per square | $80 to $150 per square based on pitch |
| Overhead and profit percentage | 20 to 30 percent |
| Contingency percentage | 3 to 5 percent |
Set up your spreadsheet so changing the roof squares automatically recalculates material quantities, labor hours, and total price. This lets you generate estimates faster and reduces arithmetic errors. If you prefer a ready-made solution over building from scratch, the PDF Estimate generator offers an industry-specific roofing format with these fields pre-configured.
Common mistakes new contractors make and a final checklist to avoid underbidding
Research findings confirm that new roofers underbid jobs because they fail to account for pitch complexity, decking replacement, and disposal fees. These mistakes are predictable and preventable. Here are the most common pitfalls with corrective actions.
Forgetting drip edge and valley flashing. These linear items are easy to overlook when you focus on squares. Action: Always walk the roof perimeter and every valley during your inspection. Note linear footage directly in your field notes.
Underestimating pitch complexity. Steep roofs slow down crews, increase safety equipment needs, and raise the risk profile. Action: Apply the pitch multiplier to area and apply a pitch premium to your labor rate. A 9/12 roof is not priced like a 4/12.
No decking contingency. Assuming the decking is fine is not a strategy. It is a gamble. Action: Always include a per-sheet decking allowance with clear change order language.
Not itemizing disposal. Bundling disposal into a lump sum hides a real cost and makes it harder to justify. Action: Get a dumpster quote for every job. List it as its own line item.
Missing permit fees. Permits are not optional in most jurisdictions and the fee is easily verified by the homeowner. Action: Call your building department before you write the estimate. Include the exact fee.
Ignoring two-layer conditions. If the home already has a shingle overlay, your tear-off costs nearly double. Action: Check for multiple shingle layers during inspection. Price tear-off accordingly using the two-layer rate of $125 to $175 per square.
Final pre-submit checklist: Squares measured and rounded up. Pitch multiplier applied. Waste factor included. All linear items counted. Tear-off layers confirmed. Disposal quoted locally. Decking allowance included. Permit fee verified. Overhead and profit calculated. Contingency added. Change order language in place. Exclusions listed. Payment schedule included. Warranty terms stated.
FAQ and research limitations — what data we could not find and what to verify locally
Not every question has a clean answer from the available research. Here are the gaps and what you should verify for your specific market.
Missing data on profit loss from pitch errors. No percentage of contractors losing profit due to pitch error was found in the supplied sources. Evidence is limited. Anecdotally, steep pitch underbidding is a known profit killer among experienced roofers. Track your own jobs to build a local benchmark.
No NRCA waste formula for steep roofs. The supplied sources did not reference any NRCA waste calculation. Evidence is limited. Use conservative waste factors of 10 to 15 percent for steep or complex roofs and document your reasoning in the estimate.
Dumpster and protection costs not fully separable. The research data could not isolate protection costs from general disposal and tear-off figures. The disposal portion is approximately $300 to $800 per job based on one source. Call local dumpster providers for current pricing and add your own protection line estimate based on materials used.
What to verify locally: Permit fees from your building department. Dumpster and landfill quotes from at least two local haulers. Shingle and underlayment pricing from your supplier for the current week. Labor rates based on your crew’s actual productivity and wage structure. These four data points make every estimate defensible and accurate.
Sources, templates to download, and next steps for the reader
The per-square ranges and pricing data used throughout this guide come from the following sources:
- SquareDash tear-off cost data — all-in tear-off at $1.00 to $1.75 per sq ft ($100 to $175 per square), two-layer tear-off at $1.25 to $1.75 per sq ft ($125 to $175 per square).
- Gorilla Roofing labor costs overview — tear-off labor at $1 to $3 per sq ft ($100 to $300 per square labor-only).
- Ridge Top Exteriors roof replacement costs 2025 — typical tear-off totals at $1,000 to $3,000 per job.
- Puetz Construction average tear-off and replacement cost — disposal fees at $300 to $800 per job.
Next steps: Download or build your estimate template with all line items covered in this guide. Pilot it on your next three estimates. Compare your final numbers against your previous bidding method. Adjust per-square rates based on actual job costs. Over a dozen estimates, you will have a calibrated pricing model that protects your profit and wins more jobs at higher prices than your competitors who are still scribbling numbers on a clipboard.
Frequently Asked Questions
What is a roofing square and why is it used?
A roofing square is a unit of area equal to 100 square feet. Roofers use squares because roof areas are large and pricing per square foot would create unwieldy numbers. If a roof measures 2,400 square feet, it is 24 squares. Materials like shingles are packaged and priced per square, making this the natural unit for both estimating and ordering.
How do I price a roof with multiple different pitches?
Measure each roof plane separately. Apply the correct pitch multiplier to each plane based on its specific rise over run. Add all adjusted plane areas together, then divide by 100 to get total squares. For labor, use the steepest pitch on the roof to set your per-square labor rate since your crew must work at that pitch across the entire job. Do not average pitch multipliers across the roof.
Should I include a warranty section in my roofing estimate?
Yes. List the manufacturer’s material warranty separately from your workmanship warranty. Manufacturer warranties typically range from 25 years to lifetime depending on the shingle grade. Your workmanship warranty is separate and typically ranges from 2 to 10 years. Stating both in the estimate manages expectations and reduces future callbacks being treated as warranty claims.
When should I charge a lump sum instead of per square for tear-off?
Lump-sum tear-off pricing makes sense for very small roofs under 10 squares where mobilization costs are disproportionate to the square count. It can also work for complex tear-offs with limited access, steep pitches requiring special safety equipment, or jobs with known hazardous materials. For most residential jobs, per-square pricing is more transparent and scales fairly with roof size.
How do I handle the homeowner who only wants the cheapest price?
Do not strip out line items to match a lower bid. Instead, educate the homeowner on what the cheaper bid is probably missing. Ask if the other estimate included disposal, decking replacement allowances, permits, and a workmanship warranty. Most low bids exclude at least two of these. Your estimate does not need to be the cheapest. It needs to be the most complete and clearly communicated. Homeowners who understand what they are buying rarely choose the bottom bid.